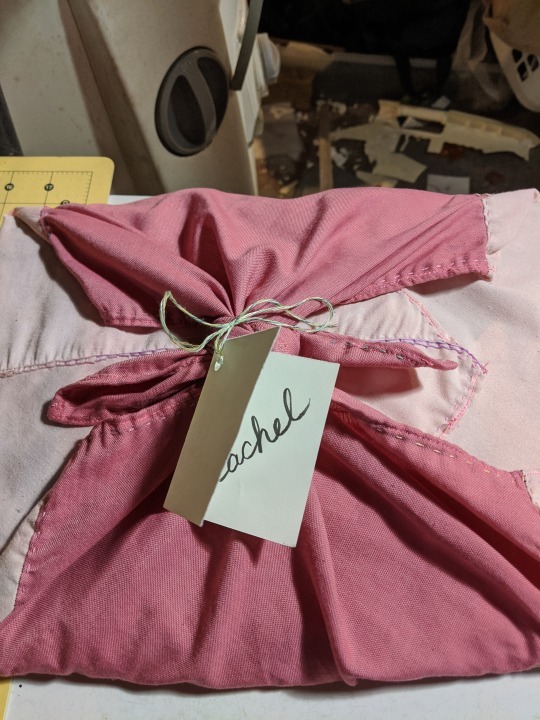
dragonlady7: self-portrait but it's mostly the DSLR in my hands in the mirror (Default)

subuwoo

via https://ift.tt/F6s3DrQ

So I wanted to make myself the kind of organizer that hangs over the back of your car seat to hold your stuff, to keep the things that ought to stay in my car in, because with my old car, I hauled so much cargo and loaded and unloaded the thing so often and wound up with so much random junk in there that I lost my tire inflator, foldable shovel, and most of the rest of it. I thought, if I just attach those to the back of one of the front seats then it doesn’t matter what I do with the car, if I’m hauling baby chicks or small humans, passengers or cargo or what, I don’t have to worry.

I shopped around but I didn’t see anything like what I wanted, so I went down in the basement and poked around.

Thus follows not exactly a tutorial, but a description of my thought process. This took forever but if I had to do it again I could do it faster, I think.

I had a weird but perfectly-sized rectangle of heavy-duty polyester canvas (twice as long as I needed, but exactly as wide, so I could use it double thickness), some suit interfacing, and then several yards of an all-plastic but beautiful brocade I bought from Jo-Ann’s back when I didn’t know how to shop for fabric.

So I bought myself a new tire inflator and folding shovel, and then measured the jump-start powerbank I already own, and made pockets exactly sized for those three things. I also guesstimated a pocket for my motley collection of ratchet straps. And then I laid those out on the bit of canvas, and figured I had room for a wide short pocket across the top– gathered the bottom, and put a channel at the top and pulled elastic through, then sewed two seams down it to hold it into three separate pockets.

I did french seams on the first square pocket then realized that made it too small so I had to piece a little extension around the back of it. Then I realized that all-plastic brocade ravels horribly… unless you run a lighter along all the cut edges. Bickety-bam instant selvege. So I melted the edges of all the rest of my fabric, and no more French seams means no more excessive seam allowances.

(I didn’t exactly follow this method but I did find a good tutorial here for how to make a cargo pocket https://sewmesomethingcourses.com/courses/cargo-pocket/making-a-pattern-for-your-cargo-pocket/. It might have worked better than what i did, LOL. I only made one pocket pleated, and one gathered, the others I tried mostly to make to size.)

[image description: a black panel of canvas lies on a table, with three pockets made of brown/black/gold polyester brocade lying atop it, chalked around like crime scene bodies.]

Laid them out, traced with chalk, futzed with the placement. Realized I didn’t have to center that top one, and if I off-set it, I could fit the ratchet strap pocket next to it.

Attached the pockets to the canvas, then spray-adhesived the interfacing to the back, then folded the canvas in half, sewed it right sides together leaving one short side open, turned it right-side out, gingerly ironed it (everything is plastic). I had some of those huge thick plastic strips they seal around big boxes sometimes in the garbage in the basement so I pulled those out, carefully ironed them flat under a press cloth, and then cut lengths of them– it was heavy-duty stuff, I think a dehumidifier had come in the package, solid plastic an inch wide– and used those as horizontal boning at the bottom, middle, and top, securing in place with a line of stitching above and below wherever there weren’t pockets. The top, I closed up by just folding the front over the back; it was the selvedge edge, so I left that raw, and zig-zagged it shut with the piece of “boning” inside, then pushed the boning up against the seam with my fingers and sewed the other side of the channel with a straight stitch.

I could not for the life of me figure out how to measure the straps. so i went out and sat in my car with a lighter, scissors, needle, thread, a pair of old shoelaces, a length of 2" wide elastic torn out of an unsuccessful earlier make (i have a roll of the stuff… at the farm, not here), and a length of heavy-duty twill tape I don’t know where I got.

I held the organizer up to the seat, safety-pinned the twill tape to the top, threaded it around the headrest, safety-pinned it to the other side. Decided it needed more support, as the upper corners wanted to flop. Used a drawstring threader to pull the shoelace through the flap at the bottom of the seat, where all the cabling for the heated seat is stored– there’s upholstery covering it, open at both sides, so I threaded the shoelace through that, just to pull the whole shebang in taut against the seat instead of letting it swing freely into the knees of whoever might sit back there. Sewed it down on one side, safety-pinned it to the other. Cut the shoelace off, then sewed the remnant to one upper extreme corner, wrapped it past the headset, safety-pinned it to the other side. Finally took the 2" wide elastic, sewed it firmly down on one side, passed it around the seat, measured it, then passed it behind the seat to sew it down un-stretched to the other side, then put it on properly. So the non-stretch fasteners are only sewed on one side, and can be unpinned on the other if I need to take the thing off.

Then I loaded it up with stuff.

[Image description: the rear of a car driver’s seat, taken from the rear seat behind it, with an organizer hanging from the headrest, brocade pockets stuffed full of objects. There’s a green object hanging from a keychain at the top left– it is a folding knife patterned to look like a leaf.]

Now the things that ought to just always be in my car can (mostly) just always be there. I should check that the tire inflator works, and I should periodically charge up the jump pack, but I already checked if the foldable shovel works (it does), and I carefully bundled up the ratchet straps into bags I made out of the cuffs of old crew socks, which sewn shut where I cut the threadbare foot off make perfectly-sized padded stretchy storage bags for light duty ratchet straps.

Top left to bottom right, it’s got:

Ratty old work gloves, a clipped-on keychain with a decorative rosary and a functional folding knife, a sock-cuff bag containing a multitool screw driver, a little baggie of tampons, and some Kleenex The tire inflator kit, the jump pack kit three ratchet straps, a folding shovel multitool thingy, and a bag of toiletries with spare socks, chapstick, hand cream, a travel toothbrush and dry toothpaste kit, and a couple other things– most of it is shit that was handed out the one time I flew business class on Icelandair.

Then, to the right, around my center console, I took a vintage like circa 2004 Old Navy nylon drawstring backpack, threaded those heavy-duty twist tie things they use to close disposable coffee bags through the drawstring bit of the mouth to keep it open, sewed some of the twill tape to the top, and added a magnetic catch to hold a plastic bag in place. The magnetic catch didn’t do enough so I have some half-broken old hair clips holding the plastic bag in better position: that’s now my car’s trash bag, and the backpack’s two tiny zippered pockets hold spare plastic bags.

Now the last thing I want to do is to get some hooks to hang from the passenger headrest, and get loops attached to my snow brush and squeegee, and hang those from the hooks, because otherwise they are always scattered around the floor of my car in the way of whatever I want to do.

Anyway. Ready for the inaugural road trip Sunday, when I drive back to the farm. (Your picture was not posted)

dragonlady7: self-portrait but it's mostly the DSLR in my hands in the mirror (Default)

via https://ift.tt/UqACbj1

jenrenfieldhandmade https://jenrenfieldhandmade.tumblr.com/post/687221317798346752/please-enjoy-this-shitty-meme-i-made-to-sum-up-my :

Please enjoy this shitty meme I made to sum up my last couple of days (Your picture was not posted)

serge on

Jun. 18th, 2020 09:27 pm
dragonlady7: self-portrait but it's mostly the DSLR in my hands in the mirror (Default)
via https://ift.tt/2YQdJhg

So, thanks to the negative coronavirus test, Farmkid got to go to the beach with her cousins and grandma and grandpa. but she also got to bring her best friend, whose mom does the books on the farm. The two of them are inseparable, and hadn’t seen one another for… mm, maybe a week? Anyway they’d been mutually pining. And my mother was like, why not just have Other Little Girl just come to the beach with us?

So Mom and Dad took five children to the beach, with Farmkid and her bff among them (they’ve been telling everyone at school they’re half-sisters, which is hilarious; they are both blue-eyed blondes of similar-ish builds, so, but they’re also only three months different in age so their fictional mutual dad was a Busy Guy apparently), and BFF’s mom did the books for the farm.

I also had told her she should bring her serger by; we’d talked about it before, and she’s a really amazing quilter and such, and was like “oh I have a serger but I don’t know how to use it” and I was like Boy Do I Know How To Thread Those Fuckin’ Things (after the bent upper looper arm incident that meant I had to rethread my serger four hundred times), so she brought it over and in among all the other things, I threaded it for her. it’s an impressively vintage model but it’s actually much nicer than my much much newer one, i think. 

So I got that threaded and working, and she left it here for the weekend and I’m banging out several small projects I had with me that would be easier to do with the serger. I only have white thread for it here (argh, i have So Many colors at home, oh well), but that’s fine, that matches well enough with the stuff I’ve got. 

I felt very useful and competent for once, so that was nice.

[image description: a Singer Merrittlock serger on a brown faux-wood table with a rainbow and blue thing next to it sewn together with white overcasting on the seam.]
dragonlady7: self-portrait but it's mostly the DSLR in my hands in the mirror (Default)
via https://ift.tt/2KQeRuD

csevet:

weird niche drama i’ve found in vintage sewing machine facebook groups

singer groups: look at my machine! it has flowers on it!

kenmore groups: look at my machine! it sews through ten layers of denim!

*sobs* all i want in life is a Kenmore made the year my parents married is this too much to ask
– signed, My 2009 Singer Has Spent Nine Of The Last Ten Years Broken In A Series Of Different Ways
dragonlady7: self-portrait but it's mostly the DSLR in my hands in the mirror (Default)
via https://ift.tt/363acP4

Awoke this morning at 4:30, got out of bed at 5, and spent about an hour puttering around in the basement assembling myself supplies to bring with me for a hand-sewing project. Mostly, it’s two bits of fabric remnants that I wanted to make into larger remnants, so I cut them in half along the short edge and plan to join them up along the long edge. I want to use the by-hand bojagi piecing technique to make them be usable from either side with this method. I have no final plan for what to do with them, it’s just that I wasn’t using them in their long narrow configuration either, and so if they’re squares I’ll be more likely to use them as handkerchiefs or tablecloths or something, IDK. I also cut out some chunks of fabric with an eye toward making a tarot card deck container thing, but I haven’t got a pattern, I just figured out the dimensions it had to be and cut enough outer fabric, lining, and then a scrap of flannel for padding if I make it quilted, and I’ll try to find a pattern this morning and figure out what shape I should make it be. 

The Kindle case is nearly finished, and I figure I’ll do that this morning too.

Both of us have suitcases packed, and then I’ve hauled out carry-ons for both of us. Dude was like “but I don’t need a carry-on, I’ll have a personal item?” and I was like “I’m making you carry the food and some of the things I don’t want to carry because my bag will be too full otherwise” and he was like “oh. right.” 

So. 

Behind the cut, I’m going to describe the Kindle cover I’m making. I have some photos, but it’s not like, a tutorial– I didn’t actually take process photos really, and I don’t have any measurements. But anyway. This is my Extremely ADHD Sometimes This Works: Extreme Hoarder Edition method of object construction, for your edification and amusement.

So I wanted this to both hold the Kindle so I don’t keep hitting the off button while I’m reading from it, and to protect it– my old one died in Kyrgyzstan when a stressed cabbie shoved my backpack into the corner of an accordion in the trunk of his cab at three in the morning, so I’m acutely aware that the screens are susceptible to that sort of damage. 

I found several tutorials, and had somewhat intended to make this one [https://www.charlottenewland.com/2013/01/kindle-cover-tutorial.html]. But here’s the thing: I am not going to buy fabric, buy plastic canvas, and buy endless rounds of fusible interfacing, when I have a basement chock-full of Mysterious Hoarded Shit.

So I started with a scrap of canvas– actually I think it’s twill? bull denim perhaps?– of unknown provenance– virgin yardage, it’s not picked out of an old garment, but I genuinely don’t recall what it was offcut from. It happened to be the correct width, so I just cut several lengths of it. No, I did not measure, I just put my Kindle down on it and said “that looks right” with no regard for seam allowances or anything. Then I used that piece of canvas to measure everything else. Did this work perfectly? Mm no. Did I get something usable? Sure! Probably. I’m most of the way done and it seems like it worked, so. Score one for Can’t Understand Numbers So Just Looks At Stuff. 

It needs padding, I decided, and so I found an old sock with a hole in the heel. Nothing special, an old white sweat sock, which any sane person would have long ago discarded, but I am a hoarder so I had not. I lay it on the scrap of canvas, discovered I could cut off the holey part, and rejoiced. (It’s not that the hole would be a problem, but it would give a weird texture to have either a hole or a mend in the padding layer.) Then I discovered the foot part had enough length to it that I could do another layer, so both the front and back of the case can be padded. Huzzah!

I wanted something to stiffen the case. Interfacing isn’t enough, it’s got to hold its shape enough against the tension of the elastic holding the Kindle in place. So I found a plastic container in the recycling that had a large enough mostly-flat space in the lid, and cut that out. I refined that by holding the Kindle to it, and cutting carefully with my heavy shears so that the corners were rounded and it was exactly the size of the Kindle. 

I also dug out a scrap of some old microfiber sheets left over from my Christmas wrapping project, and got enough out of it for both a front and a back.

I quilted the sheet and sock in a layer, for the back of the case, and then sewed a quilt sandwich– put the sock on top, then the sheet, then the right side of the canvas, sewed around three corners, flipped it inside-out, then I had a bag. Clipped corners, refined it a little, then slid the cut out of the plastic lid into it. Perfect. Set it aside.

Then I did the top layer, realized I’d made it slightly too narrow. That’s fine, I’ll make the hinge section bigger. Cut a piece of a different plastic lid, which wouldn’t have worked if I’d made the top piece as big as the bottom piece, but since I fucked up, the narrower bit of plastic fit. Didn’t bother quilting the sock to the sheet, just sewed the three edges and clipped the corners, flipped it, put the plastic in it.

Now I’ve got two padded fabric boards, slightly different sizes. So I took a third piece of canvas, the same size as the front and the back, and lay that down to be the hinge. Had a narrow strip of sock left, and a narrow strip of the gray sheet. Stitched those down slightly offset from the middle of the canvas hinge piece, just turning the edges under with my thumbnail so that it was a relatively straight section– stitched right down the middle first to hold it all steady, then up the two sides to make it a flat quilted section in the middle of the canvas hinge.

Belatedly, I realized I wanted to stiffen the hinge, so I unpicked a tiny piece of the seams on either side of the center, cut two thick cable ties to the right length, and poked them in, so the hinge won’t be floppy. 

Now for handwork, no more machine. This won’t work by machine, because the plastic’s in there now so the needle can’t go all the way through. The nice lady’s tutorial would be better because it’s got all the correct order of assembly, but the bonus of using handsewing as therapy is that you can literally do it in any order because you can always painstakingly scrape your needle through just a few threads and sew a seam completely wrong and have it still work just fine.

I closed up the top of the front and back pieces– there wasn’t enough seam allowance to do it on the machine, and i wanted it good and tight anyway, so I just folded both sides in and did a decorative overcast stitch (a blanket stitch) over the edge. I may go around all of the edges and do a decorative overcast as a final finish, just to hammer home that this fucker’s hand-sewn. I like that kind of shit. If I were doing this again maybe I’d put more padding in, because the plastic’s got some ridges in it and it makes for a weird texture, but I didn’t have enough seam allowance and figure it doesn’t matter. Still, bear that in mind if you can’t find a perfectly flat sheet of plastic either.

I cut a broken hair tie into four pieces– well, get it right. I cut a hunk from it that looked right, sewed it to the larger panel which I decided is the back, and then cut another hunk and sewed it down, and then I had a piece left that looked like I could probably just cut it in half and use both halves, so I did that. Turns out I was right. Here, now I’ve got a photo to show.

[image description: looking down at an object that’s gray on the front and cream on the back, where black elastic loops have been applied at the four corners– you can really only see the top left corner, which is facing the camera. In the back is a very cluttered workspace full of spools of thread and scissors and needles and such. At this angle you can only catch a tiny glimpse of the blue pearl cotton I used for the decorative overcast stitch at the top edge.]

Just kinda poked buttonhole/craft thread through there with a needle until it looked pretty solid.

Holds the Kindle fine: 

[image description: a Kindle Paperwhite held by elastic loops at the four corners to a gray surface. Slightly confusing image because so much clutter in back; a loop of a broken hairtie extends above the top of it, and that’s the second broken hairtie I collected for the project and didn’t need. You know, how the elastic comes disconnected and then the fabric still holds but like, stretches out? That’s what I mean, “broken hairtie”. I could pave a highway with how many I have but using one up is a nice feeling. I completely stole that idea from the linked tutorial, so.]

Next I blanket-stitched the top and bottom raw edges of the hinge panel, and then I blind hemstitched the two side edges, because I figured doing the finishing sewing separately from the structural sewing would probably make both turn out better. I started to do boning channels along the cable ties in the hinge, but abandoned that– I’ll do that as a finishing touch once I’ve done the structural stuff. Just to keep things from shifting around and to give it a more finished feel. Not that this is ever going to look like anything but a handmade disaster, but that’s my aesthetic.

I lay out the top and bottom and hinge with the Kindle in it to figure out where everything needed to be, and pinned down the overlapping part of the canvas hinge panel, and then realized what I truly need is to join the edge of the gray panel in the middle of the hinge to the edge of the gray interior surface of the front panel. So I’ve done that, with an overcast stitch or whatever you call that. Ah, no, whip stitch, that’s what it is– joining two finished edges. 

Going to do the same for the rear panel, and then IDK what stitch you call it but I’ll have to attach the canvas hinge edges to the canvas layer of the front and back without going through the plastic, so I’ll figure out how to do that attractively somehow. And then I’ll be done.

[image showing all three panels laid out partly overlapping– front panel off the left edge, then the hinge showing the machine-stitched attachment of the gray panel to the cream panel, then the back panel showing the elastic loops and really shitty halfass quilting job where I mostly just wanted to make sure the sock wouldn’t shift around too much while I was sewing.]

Oh, and here’s a shot showing the plastic insert going into the front panel– it’s literally the top of one of those shallow rectangular takeout containers like Mighty Taco puts its Nachos Supreme in, for real. You can see it’s not totally flat, and that might bug some but I am out of fucks to give. It’s flat enough that it won’t break the Kindle, and that’s what I want, the Kindle not to break.

[image description: my fingers holding a piece of clear plastic you can see has been cut by a microserrated edge, protruding from between a cream layer on top, and on the bottom a layer of terrycloth sock and a layer of gray microfiber with a raw edge.]

So I’ll probably finish that this morning, which would be nice, because then I can pack the Kindle in it and perhaps protect it against whatever this trip’s equivalent will be of a stressed cabbie with a concertina. 

I also need to borrow some library ebooks onto this thing but. Baby steps. We’re getting there.

misc

Dec. 16th, 2019 01:27 pm
dragonlady7: self-portrait but it's mostly the DSLR in my hands in the mirror (Default)
via https://ift.tt/2YSnhrL

I don’t know how LinkedIn works and at this point I’m too afraid to find out. I must have signed up at some point but I don’t know what I used to log in.

I do know that it emails me three or four times a day, and has done for years now, and I don’t know how to make it stop. What’s weird is that it gets stuck. It used to email me “so and so requested to connect with you!” and it’d be someone i’ve met in real life or whatever. Mostly thru roller derby. And I’d be like, no, I’m not connecting with shit, I don’t know how to use that site. And so it’d email me daily reminding me about it for about a week, and then it’d give up.

Lately, it’s decided to ask me, sometimes twice or three times a day, “do you know so-and-so?” and it goes back and forth between two different people, both roller derby people I haven’t seen in a solid three or four years now, maybe more– but it’s just the two of them, and it emails me about them literally twice a day. One of them used to be Dude’s boss, for a while, circa 2009. It’s. A lot. I don’t know how to make it stop and like hell am I ever logging in to that site again. 

Anyway if you’ve ever wondered why I didn’t accept your request to connect on LinkedIn that’s why.

In other news, I replaced the needle in my sewing machine as per the advice of uhhhh [profile] missbuster​? was it you? it was someone I’m connected with on multiple platforms and I’m not sure which platform the comment was on and thus I can’t find the conversation to reply to it, and maybe it was dreamwidth, and gosh on the one hand I love having multiple avenues of conversation but I sure wish conversations were actually supported on Tumblr, it’s a pretty fundamental aspect of social media that the site rather forcibly neglects. Argh.

Anyway, I replaced the needle, and yes, it helped quite a bit– the old needle was actually some kind of specialty needle and I don’t know how or why that happened but there it is. I had to buy a new pack of needles to find my old pack, but once I did, I found the old pack and all was well. The machine still isn’t fixed, though. And it turns out, I’m actually fucking terrible at hemming, so several of the furoshiki, I’ve had to either seam-rip the hem and restitch it, or just go over by hand and mend the places where I totally neglected to catch the turned-under bit of seam. It’s been sort of humbling to realize that not all of my shittiness is blameable on the tools. Though, I mean, a lot of it was, so. 

I’ll do a separate post with the Whole Saga Of The Furoshiki soon, though. But here’s a teaser picture:
dragonlady7: self-portrait but it's mostly the DSLR in my hands in the mirror (Default)
via https://ift.tt/2PtCifq

Image description: solid gray and solid navy blue fabric jumbled up on a lap, with hand-stitched running stitch hems visible in blue on the gray, and gray on the blue, and a hand needle sticking out threaded with the gray thread.

This one’s made from bits of two old sheets, pieced, assembled on the serger and then topstitched and hemmed down by hand in blue silk and gray linen thread. The gray sheet’s a horrible polyester though, I ruined my first attempt by trying to iron it and it melted! So I couldn’t press the seams and had to just hold them down by hand. We’ll see how it holds up to a washing.

image description: the same fabric from above, but folded neatly, showing the intersection of the blue and gray fabric and the parallel lines of contrasting running stitch on each side. 

The blue stitches there are functional, holding the serged seam allowance underneath to one side, but the gray is just decorative. The whole thing is wildly not actually square or straight at all, but I’m presuming that doesn’t matter. Any real Japanese person would be horrified but I’m not striving for authenticity here. You can also see on the underside of the gray corner, there, how I serged the raw edges and then folded them under, and the serging is still kind of showing a little. Listen, I’m not entering this in an SCA arts and sciences thing; if I were, I wouldn’t have used old polyester bedsheets.

image description: a rainbow unicorn head needle holder stuck to a plastic box lid, covered in glass-head pins and a needle, with the edge of the gray fabric nearly overshadowing it.

My middle-little sister gave me one of these needle holder things. That’s great, except that if you sew primarily garments, you don’t, uh, usually put them into an embroidery hoop to work on them? So a needle holder, which is designed to attach to your work in a hoop, isn’t… super functional.

But I instantly lost the rear magnet– it flung itself wildly into the couch, and I found three hairpins and a very good pair of scissors, but not the magnet– and so I went and got a stronger rear magnet and managed to get the thing to adhere to a nearby plastic box lid, which happily gives me a spot to stick my needles. It seems to work so far, and is extremely appropriate for my haphazard-at-best work habits. So we’ll see! I’d been sad to think how I could never use this thing that my sister had such good intentions about (I guess she doesn’t know that you don’t sew clothes in an embroidery hoop? She does cross stitch and knitting so it’s not like she’d know, I guess), and I’m glad I could improvise, adapt, overcome.

image description: A swathe of pink fabric with lighter pink next to it, crumpled to show some extremely shitty fluorescent pink machine stitching with trailing loose threads coming out. In the background is a hank of embroidery floss, a nice skein of pastel rainbow embroidery floss, and a nearly-empty spool of white silk handsewing thread.

This is my example of why the fuck I’m doing hand-topstitching. A little of this is my carelessness but the vast majority of this shittiness is that my fucking shitty sewing machine can’t fucking straight-stitch anymore without throwing a fit every forty-five seconds. Fuck that thing straight into the sun. 

As a side note, the darker pink fabric is an old button-down shirt of my grandmother’s that got passed to me and i tried to re-dye it anything but grungy pastel pink and got… vibrant pastel pink. So like. Not my style but a nice fabric, I’ve used bits of it in other projects and I’m glad to pass the last of it along in something like this.

Future generations may puzzle over my niece’s possessions and be like huh somebody made this by hand at home, possibly while possessed? Neat, the serger edges mean it must be Great-Aunt B, she loved sewing and had a terrible case of demons. (Definitely wasn’t great-great-grandma, she never finished a seam in her goddamn life but also knew how to topstitch.)

saturday

Sep. 14th, 2019 10:09 pm
dragonlady7: self-portrait but it's mostly the DSLR in my hands in the mirror (Default)
via https://ift.tt/31oGm5p

I decided again that discretion was the better part of valor, and instead of leaving early this morning to spend three weeks at the farm, I rejiggered the schedule so I’ll be going for one week, then back a week, and then I’ll be spending three weeks at the farm– gives us more time to get the new inventory thing settled at work, gives me time to begin winterizing the yurt and take measurements and then come back and make more quilts. yeah. 

Also, I decided to leave Sunday morning instead of this morning, and so I’ve spent today actually being productive in my own house. Four loads of laundry, including washing the chair pads for the kitchen chairs, one of which got red wine spilled absolutely all over it the other day. It was a perfect day for line-drying– intermittently sunny, but a steady and quite heavy breeze out of the west, which sucked/snapped the linen sheets dry in like literally twenty minutes. (I have discovered that linen sheets can only be hung to dry, and only outdoors, and cannot be used at all if it’s not outdoor-clothesline weather, which is fascinating. The dryer irons intractable creases into them; hanging over a door crinkles them. They must be on a line and must snap in the breeze. Only then do they come out soft and usable.)

And I also cut out a version of the – oh, I don’t think I mentioned, I borrowed the Alabama Stitch Book from the library on the recommendation of mmmm was it [profile] missbuster I think it was?? thank you!!! – anyway. It includes a pattern for the T-Shirt Corset, and for a wonder it was still present in the library book, but of course an XL is for a 44″ bust and that’s quiiiiite a bit shy of my measurement, so I traced it onto some newsprint and then went around and added like uhhh hhh IDK a bunch around the edges, and cut it out and just gave it a shot on an old bleach-stained black shirt and a newish giant dark gray shirt Dude picked up at a tech conference with the logo of some long-ago startup on it. (Because, of course, Ms. Chanin’s instructions have you lay it all out on a single shirt, but she also is assuming you are less than 44″ in circumference at your largest point, and so the layout directions were also useless.) (I do like the book, I like it so much I bought it– for my BFF, who has a bust measurement of maybe 40″, so she’ll be able to use it as written.)

I appear to have missed the straight of grain on at least one of the pieces, which was bound to happen since I couldn’t use her layout and also I’m working on a too-small table, but apart from that, it went together pretty well. I also did not hand-sew the entire thing or in fact a single stitch on it, because while I admire her slow fashion aesthetic, I own a fucking sewing machine, and would like to know sooner than several weeks from now whether the pattern needs serious adjustment or not.

So I basted it all together with my sewing machine, coincidentally with hot pink machine embroidery thread because that’s what I had in there, and tried it on and then adjusted a couple of the seams, and then all of the lower seams had utterly failed to line up at all, so I cut it off level with the shortest one, and then I dug out an old broomstick skirt my BFF gave me that I’d kept with the intention of using it in a different refashion that didn’t work out, and instead of continuing to save it for that purpose, I just cut it off before I could reconsider, and then I took everything upstairs to the serger, and instantly broke a thread and had to rethread the thing so I decided, fuck it, I’m putting the hot pink embroidery thread in the upper looper spot (that’s the one that shows), and doing all the stitching on the exterior the way the pattern calls for (it’s to show off your handsewing, and like, i get it, but I’m not doing that), and so I just sat there and rethreaded the serger like four times but sure enough, in the end, I have a new dress. So that’s not too shabby.

I also cut a circle skirt out of a discarded twin fitted sheet– which neatly wound up not using the badly-worn parts of the sheet– and found the sleeves of an earlier cut-apart t-shirt to be pockets, and the waistband I cut off the broomstick skirt will do to gather the circle skirt to, and then I can sew that to the top of another promotional t-shirt I took in the shoulders of and hand-embroidered the neckline of and cut into a crop top I won’t wear and had figured on sewing onto a skirt. Then I’ll have another t-shirt dress.

I was so productive because I was procrastinating making another yurt quilt, by the way. But it was nice, and I’ll take it, and also I have no idea how to attach pockets into a circle skirt so I should look that up, I started and that’s when I broke the upper looper thread and abandoned that project, so. 

Anyway I’ll try to take pictures of the completed dress soonish, we’ll see how that goes. 

upcycling

Sep. 9th, 2019 01:43 pm
dragonlady7: self-portrait but it's mostly the DSLR in my hands in the mirror (Default)
via https://ift.tt/2ZNamuL

I don’t have good photos or a proper tutorial for this but I’m going to tell the story anyway. 

Last weekend my dude went through his closet and set out a pile of clothes he didn’t want to wear anymore. He mostly wears button-down dress shirts by day and t-shirts to sleep in, so the discard pile was just a huge collection of dress shirts, with two t-shirts. I went through them again, and sorted out three that weren’t badly worn, just didn’t fit or weren’t to his taste in some way. Those, I can donate or do something along those lines with. The others, though, all had worn or faded or torn bits, little stuff here and there, but it all meant they weren’t things anyone would want in their current form.

So I cut three of the shirts apart and used them to construct a muslin of a dress pattern I wanted to test. This is a thing that’s always stymied me, in sewing– the idea that not only do I have to cut into nice new fabric to make a thing, but i have to do it twice. I know you need to make a muslin (or a toile, whatever, IDK the difference) if you really want to make a garment that fits you properly, but it’s always seemed so expensive and wasteful. 

Now, using old shirts for fabric isn’t a new idea, but the twist I have on this is that my dude is a very thin person, and I am a rather fat person, and so I can’t just place a pattern piece on a bit of his shirt and actually cut it out. So to deconstruct the shirts, I removed the sleeves and the back yoke, and left everything else connected. And indeed, my bodice pattern pieces extended beyond the side seams of the backs of the shirts. Even the sleeves of the muslin were larger than any of the sleeves I’d cut out of his shirts, so I had to cut apart that third shirt to get the sleeves out of the big back panel. 

And then I needed the majority of an old twin bedsheet to get the skirt out of. I needed the skirt because it did change the fit of the bodice considerably to have all that weight on it. 

I may at some point cut the rest of the shirts up and then, carefully matching the grain, patchwork them into another large usable hunk of fabric. I might do that and I might not. Either way, though, this muslin would’ve taken three yards at least of new fabric, and I’d have been able to pick it apart to make a different muslin out of it maybe, but maybe not– the bodice includes several darts.

I might wear it as-is, but I might take it apart. We’ll see. It’d be a reasonably fun farm-work dress, if I get several pockets into it, but might not be so great for work-work. (The colors don’t clash but they only coordinate if you’re kind of. From a different planet, I think.)

The thing to keep in mind is that the drape of a bedsheet is markedly inferior to that of like, any nice fabric at all, so if I make this dress from linen or rayon, as I want to, it’s going to fit completely differently. However! Having the pattern adjusted correctly because I made a muslin is only going to help with that, and maybe it’ll get me to actually be able to bring myself to cut into new fabric…

terrible photos behind cut:

the three shirts in question (yes, very classy)

the only photo so far of it on me, featuring a weird lens reflection of a CFL bulb (that’s the weird green spiral in midair) and my armpit, pre-sleeve-attachment

you see how that needs a whole nother dart. Also you can see how I had to use the back and side of the original shirts, both of them, to eke out enough material for my ginormous hoots.

Yah this dress looks super awkward. If I’m going to actually wear it as-is, I’m going to refine the fit to update the pattern, and then I’m going to spend a ton of time and effort adding pockets and embellishments. I think a bunch of applique wouldn’t go amiss. Is it worth that much effort? Well, is anything worth anything?
dragonlady7: self-portrait but it's mostly the DSLR in my hands in the mirror (Default)
IMG_20190305_151335

The only purple fabric I could easily find in my discards/scraps stash was stretch jersey, and I don't have to know a lot to know that's not really ideally suited to quilting.
So I decided to hand-sew it, along with some other tricky bits and scraps, to some non-stretch backing fabric, the lining of a skirt I deconstructed over the weekend.

I also seamed a too-small scrap of brocade to a strip of unrelated scrap fabric, and then tacked the seam allowance down in gold glitter thread.
So there's my little stash of over-elaborate hexagons for today.
(I remembered to find my scissors and thread, so.)
dragonlady7: self-portrait but it's mostly the DSLR in my hands in the mirror (Default)
I intended to continue on the hexagons at work today, waiting for the database, but I immediately realized I'd forgotten my scissors-- they didn't get packed back into my work bag, somehow, and went separately and I must have removed them somewhere.
I got by, with some dull paper scissors that were here, and got a few things cut out, and was all right until I realized the other thing that had gotten packed back separately from the work bag, which was my thread.
So.
No progress there.

I'm struggling to design the yurt-belt-quilt. I figure I have ten feet by eighteen inches, so I should do ten one-foot-square panels, and then have a top band and bottom band. Fine. But what kind of design shall I do?
I've decided I think I'll attempt applique, and I might as well try a few methods. So I'm pondering that. And then I figure, applique will leave a lot of weird little scraps, and I'll set those scraps aside for some foundation-pieced crazy quilt stuff, and maybe I'll wind up alternating appliqued squares with crazy-quilted squares. I surely don't have enough fabric to do the whole ten feet, but if I do the squares separately, when I do run out of fabric I can find something else and space it all out and lay it out nice before I assemble it. Surely whatever happens, I can make it work.
The important thing is not to be too precious; this is an experiment and a sampler, not a piece of art I'm trying to sell.
dragonlady7: self-portrait but it's mostly the DSLR in my hands in the mirror (Default)
For real every time I click in the "Subject:" box it pops up really ridiculous suggestions of long-ago entries, and I don't need that. There's got to be a way to clear that without nuking my entire browser history and all the form-fill-in memories I rely on for passwords and usernames on other sites. (I know, I shouldn't, and yet.)

Dude is lying on the other half of the sectional half-napping, and sometimes answering me if I say things, but mostly he's got his eyes half-shut and staring at nothing and it's a little creepy, lol.

Have spent this weekend busy, and getting nothing done, as usual. I spent all morning yesterday rereading and lightly editing and contemplating the Mammoths novel. Finally, in the afternoon, I got to go get ice cream, as I'd been wanting to literally the entire week, since Tuesday. Picked up my package from the UPS drop point and got a fancy sundae. It snowed all day, light fluffy beautiful terrible snow, and accumulated maybe two inches, and was like thirty degrees, and if it were December I'd have been delighted but it's March and i'm over it. The sundae place was a zoo; people here are not deterred from ice cream in the cold.

This morning we got up and got out and went to the co-op, bought all the groceries we could get there, and then Dude dropped me off and went onward to Wegmans, where he had so little left to get that he came home quickly because he could go through the express checkout lane instead of standing forever in the regular line.

Today I've done three loads of laundry and seam-ripped several old garments, and now am trying to lay out a quilt for the yurt wall )
So anyhow, I need about eighteen inches by thirty feet. I actually have sixteen inches by ten feet of the pajama pants, I just figured out! So I'll start with that.

My first quilt is done-- the rag quilt from old pajamas. I pulled it out of the dryer and the seams didn't puff up quite as much as I'd hoped, but I get what it's going for, and it might just be fine.

I guess this is the late-winter-of-quilt-experimentation, after all. I've tried crumb quilting, abortively, and I'll go back to that; I've done rag quilting, I've done whole-cloth quilting, and I'm going to figure out applique. We'll see.
dragonlady7: self-portrait but it's mostly the DSLR in my hands in the mirror (Default)
Just a progress report on my hexagons-- I need to find some orange fabric!
IMG_20190222_162902

51, by my admittedly distracted count, completed so far!
IMG_20190222_162659

I should stitch some together to see if my terrible habits of cutting the corners awfully close is a fatal error when the thing is assembled, before I make too many more mistakes. But, for now, I still have a stack of precut bits and another hundred templates or so, and I want to get a good assemblage completed before I decide on any arrangements.

hexies

Feb. 20th, 2019 10:13 pm
dragonlady7: self-portrait but it's mostly the DSLR in my hands in the mirror (Default)
So I finally downloaded a template so I would be able to remember how many sides are in a hexagon. (Hint: there are two parallel sides, but no more than that, in a hexagon.) (Also hint: if you arrange six hexagons around a seventh central hexagon, they'll each be able to butt up exactly against a side of the central one. Makes sense, doesn't it? Yes.)

I cut out the template, and then I went to work and fished a bunch of discarded photo prints out of the trash. (It's a print lab. It's not like I've got to rummage much.) I found a stack of 8x12 posters that had been discarded, and sliced them into strips. I now have approximately, like, a hundred little photo-paper hexagons. (I had discovered, in my experiments last night, that regular typing paper is a bit flimsy to work with, and it tends to be difficult to keep the fabric taut.)

I also had cut a bunch of little pieces of fabric in the morning before I went in, and so I was able to sit at work and stitch a generous handful of little fabric hexagons. I haven't yet assembled any larger configurations of them-- I figured I'd make a bunch and then see what looked like it would suit best, as an arrangement color-wise-- but I see how it's supposed to go, and I see some of the pitfalls of how to choose what kinds of fabrics to do this with.
(Unfortunately any kind of stretch or knit fabric is right out. I'm pondering using spray adhesive and a little interfacing, if I want to be able to use some knits, since i have so many hoarded, but. We'll see.)
some pictures )

I'm starting to imagine maybe making a quilt that involves elements of hexies, crumb quilting, crazy quilting, and applique. It's still just kind of a daydream, but it might be fun.

geometry

Feb. 19th, 2019 04:51 pm
dragonlady7: the thonking emoji (a poorly drawn version of the thinking emoji) (thonking)
I did discover the drawback to attempting to freehand your own template for making hexagons for a hexagon quilt:
If you're a dumbass who doesn't know the difference between a hexagon, say, and an octagon.
*facepalm*

Fortunately I'd only cut out a few templates, and no fabric.

A hint: Hexagons have six sides!
dragonlady7: self-portrait but it's mostly the DSLR in my hands in the mirror (Default)
So I've made it a little farther on the salvaged-pajamas rag quilt. I decided to take almost no pains with the thing; the front is all one kind of flannel, the back all a different one, and the "batting" is, at random, scraps of two wildly different colors, and that shows through at the seams and so I should have arranged them in some fashion, but I did not and it is too late now!
So far I only have nine squares, because that makes it square. It covers my lap, and my legs if I have them folded. I should add seven more, to make it four on a side, but that's a lot; I might just add three more and make it longer than it is wide. It's about uhhhhh thirty by thirty inches, at the moment, or so-- I cut 11" squares, then trimmed them to 10.5 or 11" each, then sewed closer to 1/2" seam allowances, so they're really about 10" across.
I probably have enough fabric to do seven more squares but to be safe, I definitely have three more squares. Some of them are already pieced; I'll run out of the back fabric sooner.

The front looks fine, it's plaid and running at random either horizontal or vertical-- ha, most of them are going one direction-- and then two of the top bits are crazily pieced together, mostly because it pleased me to do so. It's all mostly hidden in how busy plaid is. I noticed that the plaid had a few little red lines in it, so I'm using red quilting thread to do a couple of lines of quilting across each panel, and that looks great. HOWEVER, the back has only pale blues and whites on it, so the red looks dumb there. Oh well, I'm not worried. I might applique some things on, or might not. Probably not.
photos with bonus couch arm assistant sideeye )

This is very much a I Am Giving Zero Shits quilt, and I hope it turns out usable for something. I find the rag look untidy but I also am well aware that it is by far the easiest method if you are not assembling a whole quilt top over a whole unbroken sheet of batting with a whole unpieced back, which just isn't.... a thing I'm likely to do.

(And in all my Googling, I'm finding that the vast majority of quilters who blog about it... don't really do the quilting part themselves. Many of them do these incredibly elaborate pieced tops and then... "finish" them by leaving them as "flimsies", which I'm not sure what that means but I think it means just the quilt top with no batting?? I'm not sure. I care the least about the piecing part, and the most about the actual quilting part, and i seem to be very much in the minority, at least as far as writing about it on the Internet goes. Which, fair enough; it's hard to photograph the actual quilting part.

I do have an embroidery frame I've never used that I'd quite like to. I'm not going to use it for this rag quilt.
dragonlady7: self-portrait but it's mostly the DSLR in my hands in the mirror (Default)
i’m such a dumbass i’ve had a headache for seven hours and i tried changing my hairstyle, eating something, drinking something, eating something else, drinking a bunch more water... i finally just took an ibuprofen and bam 10 minutes and the headache’s gone.

sigh

I did get to a tiny bit of sewing! I'm going to just. Make squares of quilt out of these old pajamas. That's all I got for a plan. Might as well practice hand-quilting on this basically-no-batting project, so that I'm good at it by the time I make something pretty.
dragonlady7: Two black-eyed susan flowers against a backdrop of yarrow flowers (flowers)


I worked on learning this song a little, today. I can find the melody notes on the banjo but have no idea how it ought to be arranged. The notion of instruments that play more than one note at once is still pretty new to me. I actually started singing to myself while Dude was out grocery shopping because the cat wouldn't stop yelling (she wanted me to sit down so she could sleep on me and I was too busy) and I figured I should yell back. Chita did not care for any of my selections. (I also sang The Green Linnet and The Bonnie Bunch Of Roses O, or as much of each as I could remember the words to. I don't sing as much lately as I used to; I don't get any singing done in the car and it's a shame, but I don't sound too rusty, now that I don't seem to have a cold anymore. But I'd like to learn Bread And Roses because it's pretty and topical, as laments for Buonaparte are not so much-- I mean, they're pretty, they're just not topical. If there was ever anyone so thoroughly undeserving of the beautiful songs written for him... might be a tie with Bonnie Charlie, now I think on it.)

I thought of it because I baked bread today-- I defaulted to Joy Demorra's recipe (bibliosphere on Tumblr, but her Patreon is a better archive since Tumblr keeps flagging the bread photos as sinful, and it's unlocked there), and she used to just call it Peasant bread but I see the title's gotten upgraded to Communist, now. I've no insight into which label suits it better but there's some novelty in using a mug to measure. I'm not the target audience for that, but my favorite recipe is the no-knead one (I hate getting my hands so sticky) but I wanted to make little boules and I don't have suitably-sized baking pans for that, so something kneaded and hand-shaped it was. For some reason it was horribly sticky, and I had to chip it off the cookie sheet at the end because it had adhered so much, and I think I used too little yeast so it didn't rise all that well, but it will suit to put the stew into, I'm sure. Probably wound up super dense but whatever.

I also have boeuf bourgignon in the Instant Pot, and I made biscuits to use up the last of the milk that was going sour, so I also defrosted some frozen strawberries and made Dude buy vanilla ice cream, so we'll have strawberry shortcake for dessert. I thought a proper Sunday dinner was called for, as we won't be celebrating Valentine's Day really.
(Well, we will probably, as we usually do, sitting at home together, but less festive than normal because Dude's going in for some very minor surgery the day after, but surgery nonetheless, so.)

I've had a headache since about noon, so that's annoying. It's the most minor headache anyone's ever had, but I'm a big wuss about headaches, so I'm grumpy. It's fine, I've been cooking and cleaning in the kitchen all day so it's not like I have to look at screens or things.

I wanted to do some sewing today and have done none, and won't do any if the headache doesn't ease.

I had a thought, that it might be fun to do big painted banners a la suffragette-era protests. Nicely quilted ones. Bread & Roses for sure, but also "DEEDS NOT WORDS". Taking suggestions for more. I think they'd make beautiful wall-hangings, especially if I did them up super retro with like, fabric cutout letters, and beautiful finishing, and fringe on the bottom, and such. (I suppose I could do a BLACK LIVES MATTER one in the same style because an unfortunate relic of the suffragette era is how fucking racist they all were, in that early movement, and it would be wise to just... head that off. Maybe I could do "my feminism will be intersectional or it will be bullshit".) I don't know where these wall-hangings would even go, but let's not get ahead of ourselves, it'll take me decades to make them, so what the fuck ever.

I've also been dying for literally years to make one of those triangle-hangy-letter-banners? I made one that says "Welcome" that I gave my sister for a party at the farm, and I fucked it up so it's not reversible even though I went to great lengths to make it reversible-- the secret is, paint the letters the other way on the other side, but somehow I totally fucked that up. I want to make another one but I don't know what it should say. I might do another one for the farm that says something like Farmland Forever. But I'd quite like one for the yurt and I just don't know what it should say.

entrelac

Feb. 9th, 2019 06:04 pm
dragonlady7: self-portrait but it's mostly the DSLR in my hands in the mirror (Default)
Got home yesterday to find a package crammed between storm and kitchen door. I opened it to discover that my mother had knit me a shawl! Uncharacteristically for her, she had actually included a note: apparently, she had hesitated to make me a shawl because one of my sisters had bought me a cardigan for Christmas?? What?? but had been unable to resist trying out a new technique. Apparently it's called "entrelac" and it looks quite complicated. "Forgive the errors," she signed off breezily.
MVIMG_20190208_172154

What errors???
Chita approves.
Unusually, she also did not append the yarn label with washing instructions, so I don't know whether I need to hand-wash this. I might anyway!!

(To any who don't know me well, I sew and embroider and have just learned how to spin, and I do hand-lettering and signpainting as well, but I do not know how to knit or crochet, it is sorcery and also off-limits to me because I have Too Much Crafting Shit in my house. Also my mother and two of my sisters and my best friend and my mother-not-in-law and my sister-not-in-law all do yarncrafts, and so I own more hand-knitted belongings of exquisite beauty than I do stuff I've sewn, despite that being the thing I do.)

In other news I've decided to make a quilt-as-you-go lap quilt to go on the couch made out of all my hoarded discarded pajamas, with the flannels on the outside and the fleeces as batting, and it's probably going to be hideous as shit but unlike sorcery yarncraft, sewing still functions as the intended thing and is approximately the right size and structural integrity even if you fuck it up ridiculously.
I've started off with, uh, eleven-inch squares, because that was what the fleece pajama pants I was cutting up went neatly into? So I'll just be... trying to make that a thing. I don't know what size a lap quilt is supposed to be. I feel like 44" is a good start. If I have 16 11" squares, I get a 44" square, right? And then if I want to make it a rectangle I just add uhhh four more on the end and that's 20 squares? Maybe?
Shit, I don't know how to make that math problem work. Some of this shit I can do in my head, some shit I can't do full-stop even with a textbook and someone holding my hand, and I just don't know which category a math thing is going to fall into until I stop and think about it.

Well, I have eight squares, so I'll just start with those and make them and then see what they look like and how many more I need.
I would like to make the flannel scraps into a pattern but I think I'm gonna just. Not. In the interests of fucking finishing this thing, ever.

seam ripper

Feb. 8th, 2019 04:47 pm
dragonlady7: self-portrait but it's mostly the DSLR in my hands in the mirror (Default)
IMG_20190204_100104

Me and my seam ripper, we're gonna make this old shit into new shit.

Profile

dragonlady7: self-portrait but it's mostly the DSLR in my hands in the mirror (Default)
dragonlady7

January 2024

S M T W T F S
  1 2 3 4 5 6
7 8 9 10 11 12 13
14 15 16 17 18 19 20
21 22 23 24 25 2627
28293031   

Syndicate

RSS Atom

Most Popular Tags

Style Credit

Expand Cut Tags

No cut tags
Page generated Jun. 17th, 2025 05:26 am
Powered by Dreamwidth Studios